WordPress to Shopify Migration Checklist
(How to Use Matrixify to Migrate Your Blog Posts and Pages)
Migrating from WordPress to Shopify is not an easy task. Without the right guidance and tools, the process isn’t only complicated but can lead to loss of data and rankings.
And that’s the last thing you want for your eCommerce—getting a hit in your rankings or losing crucial data after WordPress to Shopify Migration.
It’s not uncommon to lose data and rankings when moving a site to a new platform. Luckily, this doesn’t have to be your story if the migration is done properly.
Having handled many WordPress to Shopify migrations, AlchemyLeads have what it takes to handle complex migration projects with ease. This guide provides the best tips to guide you to ensure a successful migration.
Crucial Steps to Migrating to Shopify
The first thing to consider when migrating your eCommerce to Shopify is the SEO impact the action will have on your online store.
If done improperly, the migration can lead to a loss of backlinks, domain authority, and organic traffic, which means fewer sales.
Whether you have a large or small store, you need a proper plan before you start the migration process.
Remember, this is a migration, not starting a new site from scratch. A single mistake can result in 404 crawl errors that tell Google not to crawl the pages.
If Google doesn’t crawl the pages, it means no indexing, and the pages’ URLs won’t appear in search results. This would mean losing significant traffic for your online store, and we bet you don’t want that to happen.
Steps to Take Before Migrating to Shopify
Below are steps to take before starting the process of migrating your website to Shopify:
Sign Up for Your Shopify Plan
The first step to migrating to Shopify is to choose your Shopify plan and theme. With the Shopify plans available, choosing the one that meets your needs is the best approach.
To help in this process, let’s look at your options and your considerations.
Basic Shopify
You may opt for this option if you have a small business. The plan allows for two staff accounts and lacks some features, including the ability to show third-party shipping rates at checkout and professional reports.
Also, Basic Shopify doesn’t allow the option to sell in multiple languages, comes with higher transaction fees, and gives lower shipping discounts.
Shopify
This plan is ideal for small and mid-sized businesses. The plan allows for up to five staff accounts and provides professional reports.
Shopify plan will allow you to sell in two languages.
Advanced Shopify
This plan is ideal for larger businesses. The plan allows up to 15 staff accounts, making it popular among large companies with more needs and big teams.
What to Consider When Setting up Your Shopify Account
Having seen the popular Shopify plans, you may wonder how to choose the best plan for your business. Here are the considerations when setting up your new Shopify store:
- Navigation: You must ensure that customers can easily access your high-value pages or products through your site’s navigation. In other words, your navigation structure should make it easier for customers to get what they want.
- Create collections on Shopify: Collections are crucial pages for SEO in Shopify. Collections allow you to organize your products into similar groups to make it easier for customers to find them.
- Products: Product URLs on Shopify are automatically created based on the product name, but you can edit the URLs when reviewing the product.
- Pages: You need to audit and review the crucial pages on your store before migration. Pages to pay attention to that can impact your SEO include the “About Us,” “Contact,” and “Shipping and Delivery” pages.
- Audit your blog: Audit your blog posts and pages before migration to ensure you only move valuable content to Shopify.
Analyzing the above factors is crucial when setting up SEO for your Shopify store.
Consider the Canonical Link Structure
SEO is a crucial component of your online store, and your Shopify isn’t different.
When you have different URLs pointing to the same content, it can be confusing for search engines to identify which pages you want to rank for.
This explains why reviewing your canonical link structure is crucial when migrating to Shopify. In other words, the canonical URL or tag tells search engines like Google or Bing what URL version to index for specific content.
For instance, an SEO website could have the following URLs:
- xyseoservice.com
- www.xyseoservice.com
- https://m.xyseoservice.com
- https://xyseoservice.com?ref=twitter
As you can see, each of the above URLs refers to the same homepage content for the SEO service site, but the URLs are somehow different.
This can be confusing to search engines because they can’t automatically know which page to prioritize when showing search results.
That’s why you need to include the canonical URL to help search engines to know your preferred URL.
Ideally, the canonical link refers to pages’ or products’ URLs that contain the ‘rel canonical’ in the HTML code.
Apart from using rel=canonical”, there are other ways to canonicalize your URLs, including:
- Use a 301 redirect. This code directs search engines and users to a different URL rather than what they requested in their browser. In other words, a 301 redirect signals a permanent redirect from one URL to another.
- Use location hashes. You can include a hash “#” at the end of a URL to point search engines to a specific location in your store.
- Set passive parameters in Google Search Console. Use Google Search Console to set some URLs as passive—URLs that you don’t want Google to consider.
Canonicalization can hugely impact SEO, so you need to remember this when reviewing canonical link structure.
Backup Your Data
It is important to ensure that your data is safe during and after the migration. The best way to achieve this is to back up everything on your WordPress site. You can use Screaming frog to crawl your site for common SEO issues.
Consider the Multi-Language Shopify Feature
Unless you choose a basic Shopify plan, you can go international with a single Shopify account.
Running a multi-lingual brand is crucial when targeting customers from different regions who use different languages. In addition, running multiple Shopify accounts allows you to customize various aspects of your Shopify store, including layout, theme, messaging, and order fulfillment.
When doing this, you should focus on hreflang tags (HTML attribute that specifies the language and geographical location a web page is targeting) to avoid duplicate content and 404 errors that can impact your international SEO.
Using the same language structure across different store URLs can negatively impact your SEO. Instead, use the same language in your handles as the store language.
By appropriately using hreflang, serve engines can serve the most relevant store to your customers.
Time is Everything
Whatever you do, ensure your store is ready before Black Friday and Cyber Monday (BFCM).
This is the period that businesses make a lot of sales, and migrating your site during this period will mean missing out on your share of sales and profits.
Instead, plan your migration way before the peak period or wait until it’s over to start your migration.
Don’t Forget 301 Redirects
You must pay special attention to SEO when migrating your store to Shopify. A crucial step in this regard is setting up 301 redirects from the old WordPress URL to the new Shopify URL.
In other words, you need to set up a 301 redirect for each page, product, or collection you migrate from the old site.
Migrating your site without setting up 301 redirects is like changing your home address and forgetting to sign to have your mail forwarded to your new address. It can lead to losing valuable backlinks and opportunities for traffic growth.
Once you have set up 301 redirects, delete your pages to make them effective.
What are 301 Redirects and Why Do They Matter
A redirect is necessary when a web page changes location. Different types of redirects use different status codes like 301, 302, 307, etc. In this guide, we shall focus on 301 redirects.
A 301 redirect refers to a page that has been permanently moved from one URL to another. Without 301 redirects, your WP site will lose domain authority and search rankings when you move your site to Shopify or a different URL.
Why Do Redirects Matter?
While implementing redirects may seem straightforward, care should be taken to ensure they are implemented correctly. Below are instances when redirects matter a lot:
- When migrating a site, for example, WP to Shopify
- A URL is broken or not working
- The site or web page is no longer active
- When fixing a web page
Redirects’ Impact on SEO
While redirects can impact SEO, you won’t experience any negative SEO impact when done correctly.
Common SEO problems with poor redirect implementation include loss of rankings in search engine results pages (SERPs) and reduced organic traffic. You must be careful when implementing redirects to avoid losing your hard-earned SEO.
For example, when migrating your store from WordPress to Shopify, correct mapping and redirecting of your URLs is crucial. Ideally, failure to redirect your crucial pages or blog posts correctly can have a huge impact on your SEO rankings and revenue.
Important things to avoid when redirecting your URLs during migration include:
Redirect chains
Assuming you want to migrate URL “X” to URL “Z.” When using redirecting chains, you could decide to first move the URL “X” to URL “Y” before moving it to URL “Z.” However, the best practice would be to move URL “X” directly to URL “Z” without having the middle part.
Redirect Loops
This is when URL “X” redirects somewhere but ends up in the same URL. You can use Screaming Frog to check for redirect loops in the redirect chains report.
Actual Migration—What are Your Options
Depending on your level of expertise and the size of the content you’re moving, you can use different options to migrate your blog posts or pages from WordPress to Shopify. These includes:
Use Built-In Shopify Importer Tool
This option can work for you if you’re moving a few WordPress pages to Shopify and have little coding knowledge.
The Built-in Shopify importer tool is a free solution that’s simple to use. The only limitation is that only Shopify Plus Merchants can use it, plus it’s not ideal for moving large data sets.
This leads us to the next option we use ourselves when moving blogs or pages to Shopify—Matrixify.
Matrixify
Matrixify is a third-party app that helps move numerous pages and blog posts to Shopify. It has free and paid versions. The best thing about their paid version is that it can be customized to match your needs, including the amount of data you want to import or export.
How to Migrate Pages from WordPress to Shopify Using Matrixify
Below are the steps to migrate WordPress Blog Posts and Pages to Shopify using Matrixify:
- Use the “All Export” Plugin to Export your WordPress files to the CSV File
- Include the Words “WordPress” and “Pages” or “Posts” in your CSV file
- Upload the file in the Matrixify app
- Select “Import” options
- Download the imported files
- Upload the images files to your Settings->Files section in Admin
- Double-check the generated Excel file
- Import your Excel file in the Matrixify app to create your pages
- Check the Import Results file
- Check your migrated blog
Now let’s look at each of these steps in detail.
-
Use the “All Export” Plugin to Export your WordPress Files to the CSV File
The first thing to do is to use the “All Export” plugin. To do this, go to WordPress Plugins > Search “All Export”> Install.
Once you install and activate it, click on the “All Export” option and select “New Export.”
Then select “Post Type.” Depending on the files you want to migrate, choose “Pages” or “Posts” from the drop-down menu and then click on “Customize Export File.”
Customize Export File
Next, you need to choose the fields to export for your posts.
While you can select “Add All,” you need to understand that this can result in a corrupt CSV when the CSV file data is broken.
The best approach will be selecting the specific fields for your file exports. Below are the fields you should include:
Pages
- Pages: Content, Title, ID, Date, Permalink
- Custom Fields: Include optional SEO fields from the Yoast plugin like yoastwpseo_metadesc, yoastwpseo_title, etc.
- Other: Status, Post Modified Date, Author First Name, Author Last Name, Slug
Blog Posts
- Standard: Content, ID, Title, Date, Permalink, Excerpt
- Media/Images: Alt Text, Featured
- Taxonomies: Categories, Tags
- Custom Fields: yoastwpseo_metadesc, yoastwpseo_title, and other Yoast plugin SEO fields.
- Other: Post Modified Date, Status, Author First Name, Author Last Name, Slug
After selecting your preferred fields, next click the “Continue” button. You can use any options that you want on this page.
You can also label your export file in the “Friendly Name” field. It can be something like “WordPress Pages” or “WordPress Blog Posts.”
Next, click on the “Confirm & Run Export” to generate your file.
Download Exported CSV File
Once the files are exported, a new page will open. You will see the “CSV” button. Click that button to download your exported file.
-
Rename Your CSV File (Include the Words “WordPress” and “Pages” or “Posts”)
Opening or editing your downloaded CSV file at this stage is not recommended because opening the CSV file in excel can result in breaking the file’s structure. Also, saving the file can corrupt it.
If you must edit the data, do so in the Matrixify Excel file.
If you did not rename your file to include the words “WordPress” and “Pages” or “Posts,” this is your opportunity to do so. The “Friendly Name” option will be something like this—”WordPress-Blog-Posts.csv.”
-
Upload the file in the Matrixify app
After you have renamed your file, the next step is to import your CSV file to Matrixify.
To do this, go to the Homepage of the Matrixify app in Shopify and select the “Import” option. Drag and drop your file into the import section or press the “Add File” button.
Once the file has been uploaded and analyzed, check the files to confirm whether they are recognized as “WordPress” format and Blog Posts or Pages.
Since the file will have a different URL path in Shopify, the app may generate Redirects in this step.
-
Select Import Options
Next, go to the “Options” section where you can select your import options—”Dry-run” and fill in “Old server URL.”
Enable “Dry-Run”
Select the “Dry Run” option in the Import Options section—here, you won’t import anything but can convert and test the file.
This option allows the app to create Matrixify Excel files and Folders with Images without importing data into the store.
Fill Old Server URL
Another field you need to work on is the “Old server URL.” Use this section to fill the website’s domain in your WordPress admin. Matrixify will use this Domain URL in the following ways:
- Use the filled domain to generate an image link for any image download that doesn’t have a domain
- Take Posts and Pages content from WordPress API if the store URL is filled. This ensures that the content migrated using different plugins is correctly formatted.
After selecting your import options, click the “Import” button to generate a Matrixify template file to import to Shopify.
-
Download the Files Generated Above
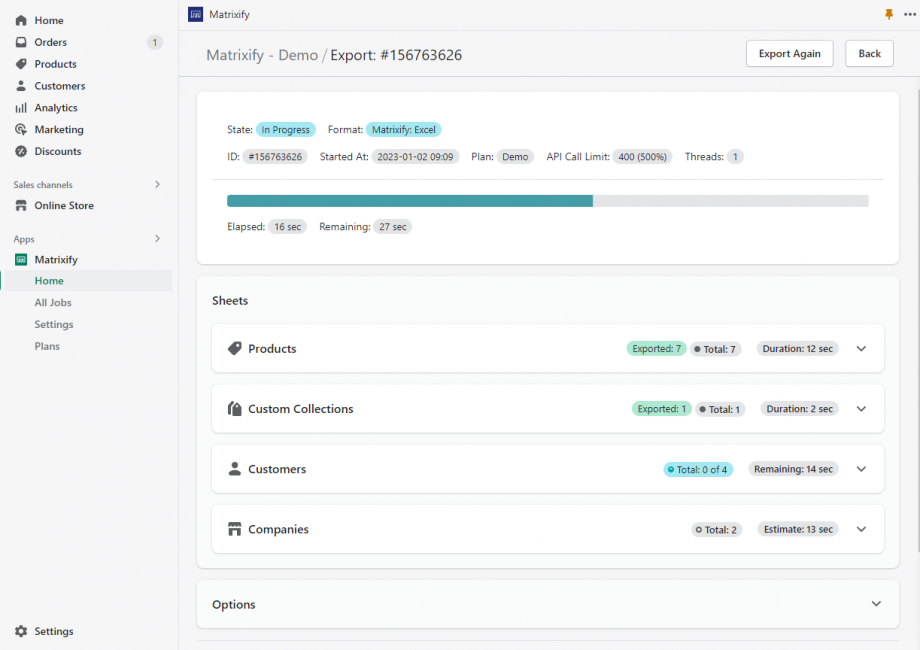
Next, you will need to download the Matrixify-generated files when you see the green “Finished” label. To download your file, click the “Download Import Result” button.
-
Upload the Images Files to Shopify
Select the directory “Images” in the exported ZIP file (containing images from WordPress).
Unzip the file on your computer and then go to the Shopify Admin Files section. To go to this section, head to Shopify Admin > Files and select “Upload” to upload your files.
Select the “Images” folder from your downloaded file and upload all the images. For a shortcut, press Cmd+A on a Mac or Ctrl+A on Windows.
Keep the browser window open until all files are uploaded into the Files section. Also, don’t change the image names—they should match the ones you moved from WordPress.
-
Double-Check the Generated Excel File (If You Did a Dry-Run)
Go to your unzipped file and select the Excel file which contains the “Blog Posts” or “Pages” and “Redirects” sheets.
Clean up any data you don’t plan to migrate to Shopify and check for any data errors that need fixing.
You will see non-colored columns to help check/edit the data but won’t be imported to Shopify.
You should also notice the image links will no longer point to your old WordPress site at this point, as they already lead to the Shopify Files Section.
-
Import Your Excel File in the Matrixify App to Create Your Pages
Again, this step is necessary if you did a dry run earlier.
If the data in the Excel file and images is correct, go to the Matrixify app and upload the generated Excel file in the “Import” section.
Confirm whether the Matrixify app recognizes the files as Blog Posts, Pages, or Redirects. The file format should be “Matrixify” at this point.
If all details are correct, press the “Import” button to import the Blog Posts.
-
Check Your Import Results File
This step is crucial as it helps identify any “Failed” items after the import. Download the Import Results file and check the “Import Comment” section to see what items have failed. Look into the issues and re-import the failed items.
The best thing is that you don’t need to keep the app open the entire time the job runs.
You can close the file as you’ll receive an email from Matrixify when the job is finished. Go to the “All Jobs” page to access your completed jobs.
-
Check Your Migrated Blog
You should now see a green “Finished” label indicating that your import is finished. Now you can grab your coffee, sit tight, and enjoy your migrated Blog Posts. Head to your Shopify Admin to see your migrated data. If you’re stuck somewhere, contact their support for help.
Post-Migration Steps You Need to Take
Migrating your data from WordPress to Shopify does not end when the blog posts and pages are imported. Take the following steps afterward to ensure you get the most from your new Shopify store.
Redirect Posts on the Old Site (WP Subdomain) to their New Shopify URLs
After migrating all content from your old site, your new redirects will affect internal links.
This is not good for SEO as it will lead to 301 or 404 errors. The best way to solve this issue is to identify pages with these errors and linking to a relevant new Shopify URL.
Bulk-redirect apps like Redirection can help set up bulk 301 redirects in WordPress to the new Shopify site. You may also use tools like Ahrefs to identify broken links or 301 redirects during migration.
Submit New Sitemap to Google and Bing
Next, select Sitemaps under index in Google Search Console to submit your new sitemap.
To find your sitemap in Shopify, go to yourdomain.com/sitemap.xml. You will see sitemaps for each content type within the parent sitemap. Repeat the same process for Bing.
Change Your Address in Google Search Console and Complete Bing Site Move Tool
You will only need to initiate this step if you changed your domain URL. Check this Google guide to learn more about this Change of Address Tool.
Confirm Whether Google Analytics and Search Console Function as Expected
This step involves checking your traffic data on your store. To do this, log in to Google Analytics and Google Search Console.
When doing this, focus on these two reports in Google Analytics that provide data to determine how sales and traffic are attributed in your new store:
- Channel sales report. When set up correctly, you will see all attributed sales channels.
- Shopping Behavior Report. This will provide information regarding your visitors’ flow, including the number of visitors that complete each action on a sale path and cart abandonment.
These are not the only ways you can get reports for your Shopify store using Google Analytics. You may want to follow this guide on how to set up Google Analytics on Shopify.
Recrawl Your Old WP Website
You need to recrawl your old site’s URL and check for any 404 broken links at this stage. You must be careful in this step to ensure you don’t miss anything. If need be, set up 301 redirects.
Monitor 404s on Your New Shopify Site
Last but not least, you need to monitor 404s in your new store continually.
Luckily, Shopify apps such as Easy Redirects and Link Monitor will automatically monitor and report 404s.
You can also set up Google Analytics to monitor and solve 404s as they occur. Another option would be to use the site audit tool from Ahrefs.
Why Migrate from WordPress to Shopify?
Shopify’s total revenue in the first three quarters of 2023 was $3.9 billion. Other statistics show that the average order value on Shopify is $85. This and other statistics make migrating to Shopify a better decision.
Below are other reasons why it makes sense to migrate to Shopify:
- Shopify is easy to use: Setting up your site on Shopify can take as little as 15 minutes. Of course, it can take longer to customize your brand options, but it’s still easy to use.
- Great customization features: Shopify is a reliable platform with many customization features, including themes and templates. The best thing is that you can use your domain name with Shopify, which makes website management easier.
- Great customer support: Shopify customer support is exceptional. If you need help, you can contact them 24/7, and they will be happy to help.
- Great design options: While WordPress has many design options, Shopify offers a variety of free and paid themes. Additionally, the Shopify app store has many applications for enhancing your eCommerce capabilities.
Ideally, Shopify is a great choice if you want to provide better customer support and experience but at a higher cost than WordPress.
Is Shopify Blogging Feature Better than WordPress?
One of the questions that many bloggers ask is whether it’s a good idea to move a large WordPress blog to Shopify. While you can opt to start a new blog for your Shopify store, you need to understand that this involves a lot of time.
If you don’t have the time, migrating your WordPress blog (large or small) to Shopify is the best option. That said, here are the benefits of using Shopify’s blogging feature over WordPress:
- You have ready readers in your store, so keeping them is easier
- It promotes cohesiveness—readers don’t have to browse between Shopify (your store) and WordPress (blog).
- Use one admin tool to manage and maintain content in your store and blog
Of course, migrating a large WP blog is not easy.
It means migrating multiple images, robust link building, and the same content structure, which is a lot of work when talking of 100 or more blogs. Besides, apart from blogs, other data to transfer include:
- Evergreen pages like company history, About Us, Shipping Policy, etc.
- Customer names, addresses, contact information like email, and purchase history
- Product photos and descriptions
- Order information, including product and the customer information
- Product and store reviews
The best way to a smooth store migration is proper planning. Think about the data you will move between the systems and the best process to use.
We Can Help Migrate Your Site
Many things are involved in migrating your website to Shopify. However, given the benefits of moving your store to Shopify, the hassle is worth it.
But you don’t have to go through the trouble yourself.
At AlchemyLeads, we can help migrate your content to Shopify without losing your SEO. Contact us below with your project details so we can get started.


Suggested
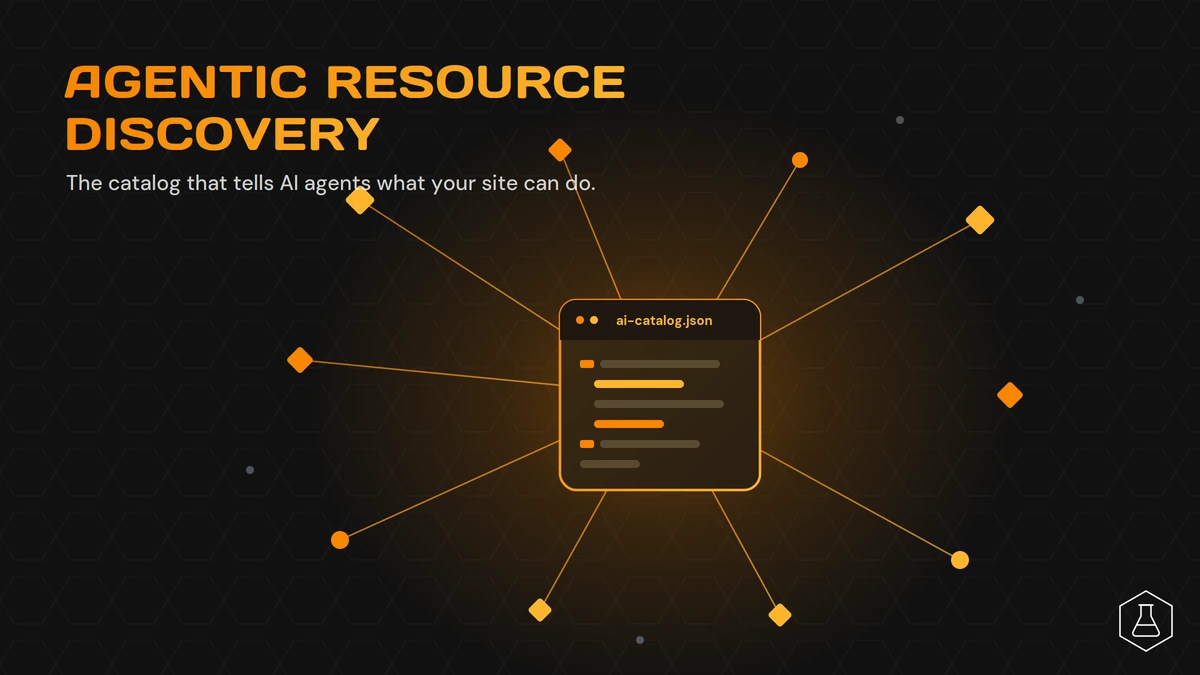
Agentic Resource Discovery: A Practical Walkthrough
Agentic resource discovery is the new standard that tells AI agents what your website can do for them. Most sites have no answer yet. They are invisible to the agents that will soon book, buy, and research for real customers. Here is the problem. Search is moving from people typing queries to agents acting on their behalf. If an agent
July 6, 2026
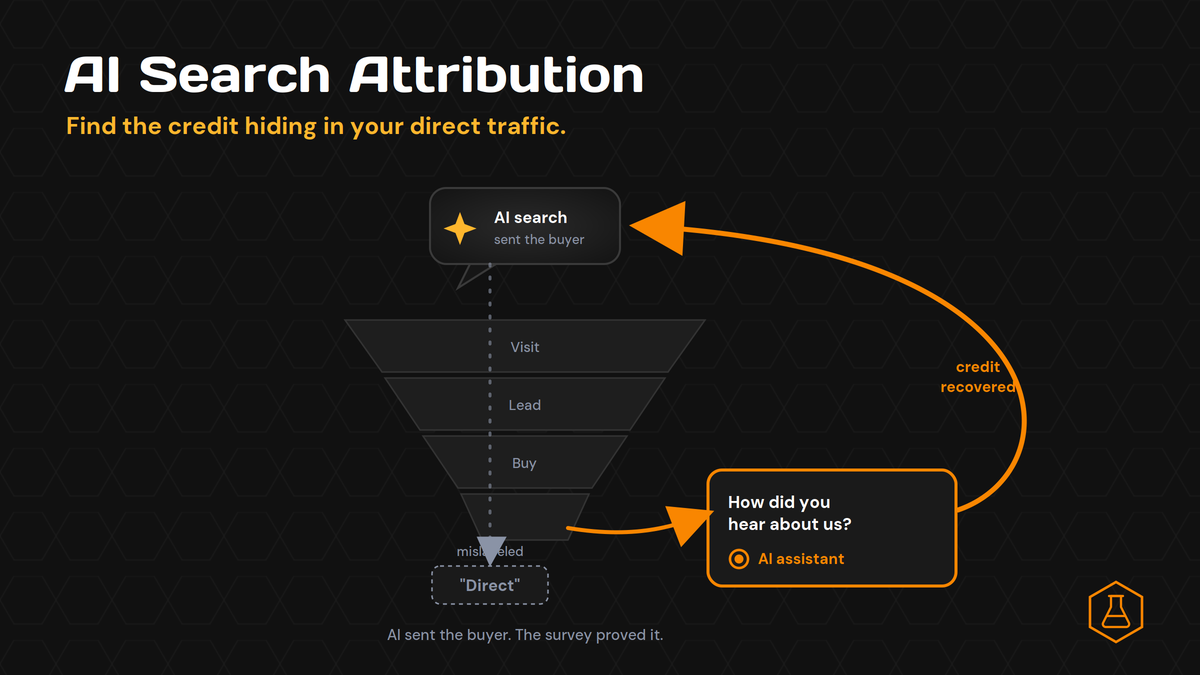
How to Solve the AI Search Attribution Funnel
Your AI search work is paying off. People are finding you in ChatGPT and Perplexity, your brand shows up in the answers, and demand feels warmer than it did last year. Then you open your analytics. The channel that grew is “Direct.” The report says AI sent you almost nothing. That gap is not a traffic problem. It is an
July 2, 2026
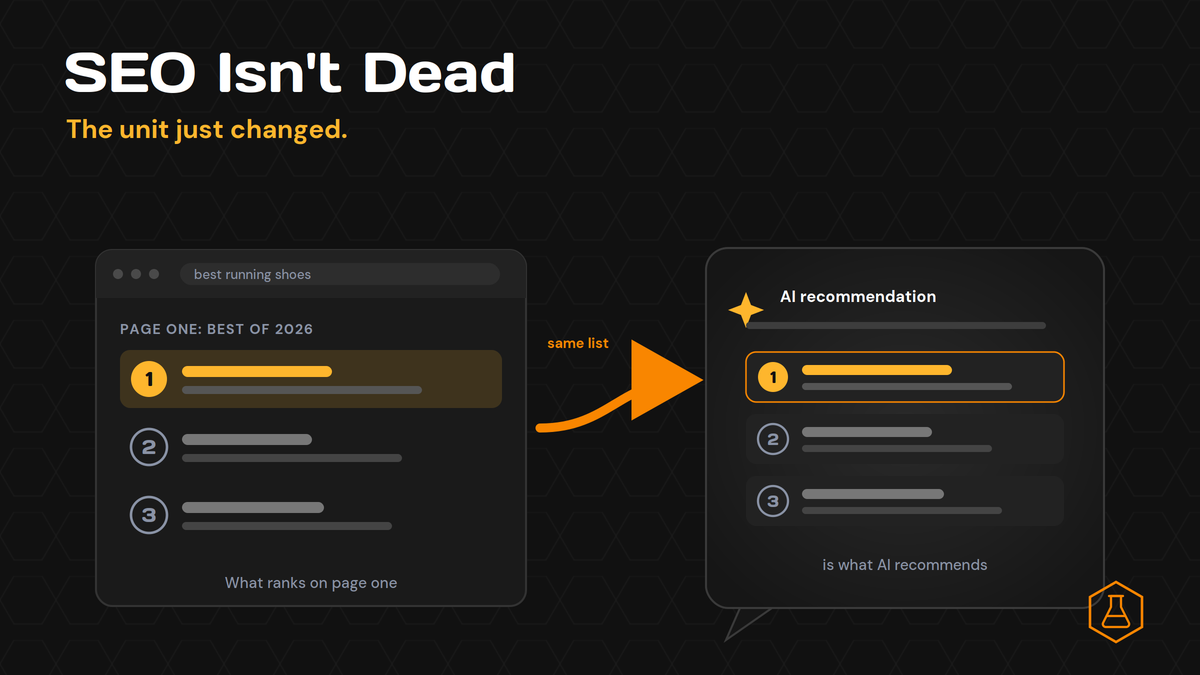
SEO Isn’t Dead. The Unit Just Changed.
Every quarter someone declares SEO dead. This year AI search is holding the knife. The logic sounds clean: if ChatGPT and Perplexity answer the question, nobody clicks a blue link, so why rank at all? We wanted a real answer, not a hot take. So we ran the test. We sent 8 buyer-style “best tool” questions through Perplexity and logged
June 29, 2026
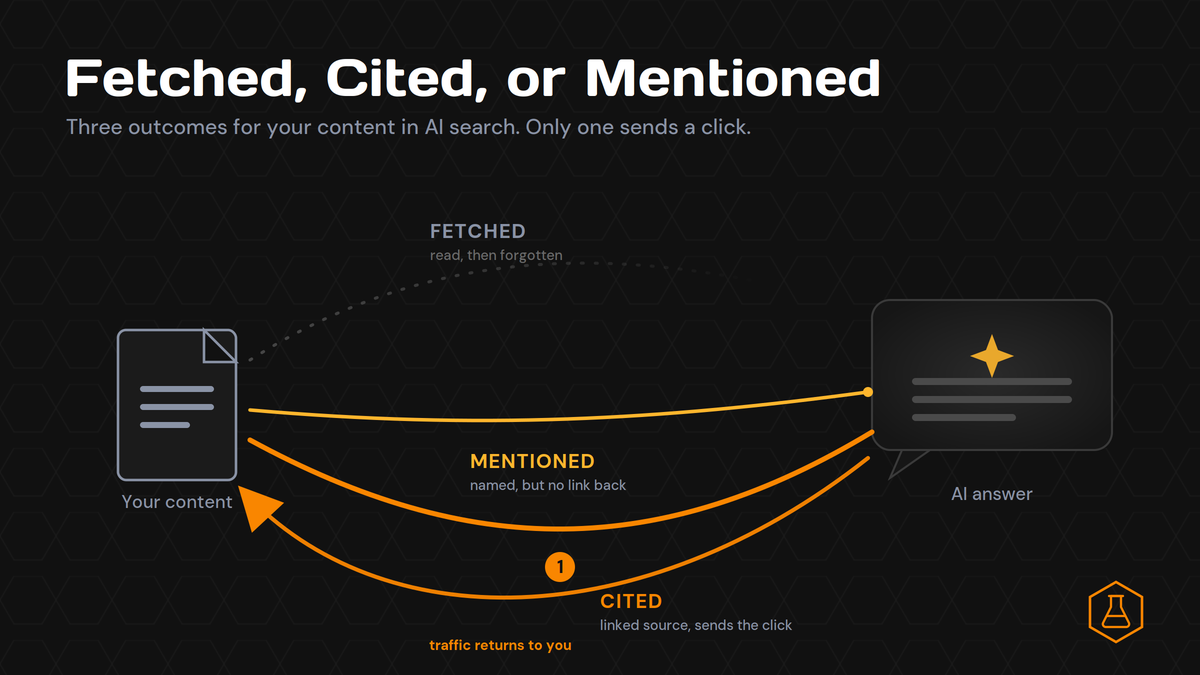
Fetched, Cited, or Mentioned: The 3 Ways AI Uses Your Content
You ran the test every marketer runs now. You asked ChatGPT about your category, watched your brand name show up in the answer, and felt good for about ten seconds. Then you checked your traffic. Nothing moved. Here is the part nobody explains. A mention is not a citation. And a citation is not the same as the page that
June 26, 2026

Open Knowledge Format: What It Means for SEO
Google just shipped the Open Knowledge Format, and the SEO world is split on what to do with it. Some say it’s the next big thing for AI search. Others say it has nothing to do with your rankings. Both camps are partly right. Here’s the short version. Open Knowledge Format (OKF) is a way to package your business knowledge so
June 23, 2026
Contact us
We value your privacy and won't share your email with others.
We'll only contact you with curated content.